Let me start this one off by saying this is now officially my favourite cake of all the ones I have done so far, this is another that has been in my mind for probably about a year.
Those of you that know my dear daddy know his passion (Obsession) for Chucks and one day I was wasting away time endlessly searching for cake ideas on Pinterest and I came across this video tutorial from Ann Reardon and instantly I thought of dad. Of course this was In October and dads birthday is at the end of November but mum and dad were still living in Auckland at the time and I wouldn't be seeing him for his birthday so I had to keep the idea in my back pocket and continue searching and pinning tutorials. By the time this November came around I had watched Ann's video hundreds of times and pinned thousands of other Chuck cakes.
Though dad has several different colours and kinds of Chucks I thought his Blue pair would be the best to replicate so I got pre-coloured fondant a lot less messy, and the blue was the perfect colour.
Although Ann's video does show you how to make one of the two logos I thought it would look best to have them printed. I was unusually un-organised for dads cake especially considering I had a year to plan so I didn't have enough time to get the Chuck Allstar logo (The circle) and Converse Logo (the rectangle) printed from my usual ladies up in Auckland but I remember being told that someone here in Rolleston does edible printing so I got them from Debbie from Logos on cakes very handy as she is only about 5 minutes down the road. I got extras printed just incase.
If you watch Ann's video you will see she has the templates on her website, but when I went onto her website it turns out you actually have to pay for the template I think I paid $4.99 Australian, which I was happy to pay as I knew I would then have the template for ever and although I found the template wasn't quite accurate it was a good starting point and next time I make it I will enlarge a few of the pieces.
I decided to try a different cake for dad as he isn't too keen on sweet cakes so mum and I found a raspberry swirl cake which we thought would be nice. So using my new sheet cake pan (See hubby I don't buy things and only use them once) I made 2 cakes as per Ann's instructions but I actually only needed the one cake for one shoe so I know next time if I want to make a pair I will make 2 cakes again, though I have a feeling that the template from Ann was actually smaller than the one she used.
My sheet pan was the same width/depth which ever way you call it as the shoe template which worked out perfectly.
I cut out 2 of the templates whole and stacked them on top of each other, Then using the side template I checked what level I was up to, this determined how long my 3rd layer would be.
It worked out to be about half, I cut 1 more layer and that was enough to make it to the correct height.
Next up it was time to sculpt the shoe down, this was quite hard as the cake was very soft and crumbly but I managed to get it done.
Crumb coating,
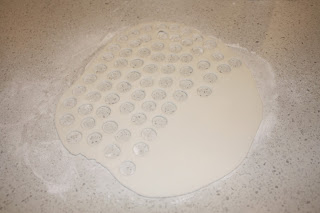
At this stage it looks a little crazy but it all works out in the end. While I had the cake in the fridge to set the crumb coat I made the Gromets for the shoe laces, I needed 20 altogether, but of course I did some extras and chose the best ones for the cake. To make the shapes I used 2 different sized plain circle piping nozzles as cutters, Ann does give you a guide to the right sizes with the template and I just matched as close as I could.
To paint the Gromets I used Silver Lusture Dust and Cake Decorators fluid and mixed into a paste.
After the crumb coating had set and the cake was colder and therefore a little more stable, I was able to shave down the 2 edges which gave a more rounded look. Then added some more butter cream on the newly exposed cake.
Now the exciting part, the Fondant, where the cake the really takes shape and comes together. Firstly some black to cover the top of the shoe. The key to this is to smooth the edges of the fondant right down so that it is flush with the butter cream and therefore wont be seen under the top layer of fondant. Ann suggests using a cardboard ring covered in baking paper for the top of the shoe, as a temporary fixture to prevent the "Tongue" of the shoes drooping down, however the wee one I made kept falling of and to be honest was more of a hindrance so I didn't use it that much.
Next up is the "Tongue" of the shoe, 1 layer of the blue and 1 partial layer of white, if I were to make the cake I would do a complete layer of white, I feel it would have given a cleaner finish. I used a very small amount of water to attach the 2 layers together, if you use to much water the fondant goes soggy and will rip and tear more easily. Then smoothed it on to the cake. On Ann's video her piece of fondant went right to the toe and further so I do think that the template needs a little work.
Next up the sides of the shoe, Key point, very important when cutting out the template you need to cut one pair, meaning cut one as is then flip the pattern over, other wise you end up with 2 rights rather than a left and a right side of the shoe. In Ann's video she cut her template in the colour and then used a thin strip of white for the edges, I did trial it this was but found making an entire template in white worked much better, it does make the fondant a bit thicker but I think it is worth it to get a cleaner look.
Again using a very small amount of water I attached the white fondant to the blue, then I wrapped in glad wrap so that it didn't dry out.
Smoothing the panel fondant was so easy, I find smoothing fondant normally on cakes much harder and I normally always get rips, but this came out perfect! Again on Ann's tutorial her panel started where mine does at the toe but went right back to the centre of the back of the shoe, mine did not but I made a fix for that after. Then I smoothed on the other side.
To finish the back of the shoes I cut the strip for the back of the shoe a little wider. Then I used the "stitching" wheel to create stitch lines on the strip. I used a little water to attach the strip to the shoe and cut it off at the top matching the height of the side panels.
Using a piece of white fondant I had rolled out before I placed on the toe of the shoe to create the rubber tip of the shoe, because the "Tongue" panel didn't go right to the toe and down this meant the white rubber part of the shoe wasn't flush with the other fondant, so I guess to fix this I could have rolled the fondant a bit thicker but I didn't foresee the issue, but no worries, as I said next time I make this cake I will fiddle with the templates a little.
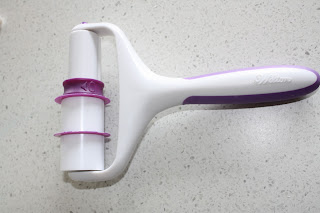
Using my fabulous Wilton Ribbon Cutter I cut white strips to match Ann's template for the bottom of the shoe.
Using a very small amount of water I attached the first strip to the side of the shoe. Now a really thin thin strip of black, which goes on the second white strip. I attached the second white strip after adding the black line.
Using the end of a paint brush and with a small amount of pressure I made indents for the placement of the Gromets. 8 down each side of the shoe and 2 of the side for the air vents. Then using a small amount of water I glued them to the shoe.
Ann's uses a clay extruder to make her shoes laces, but I am yet to acquire one of these fantastic tools, so I used my Wilton Ribbon Cutter instead, the problem I found with this, is by the time you roll your fondant to the right thickness and then cut the strips it can make the fondant quite dry and therefore easy to crack, tear and rip.
I think the laces came out well but they did take more time cause I had to keep throwing cracked and ripped laces away.
Using the same "Stitching" wheel I created stitch lines along the fabric of the shoe. and lastly it was time to attach my printed logos, this I did with a little bit of water, but next time I might use a bit of piping gel as I found the water came right through to the top of the logo and I had a small amount of ink running.
The finished cake, This was one of my most time consuming but most fun cake to make and I was very happy with the outcome. My dad loved the cake, and at first didn't realise that it was a cake. I can't wait to make it again, but in what colour??


Awesome look AND taste
ReplyDelete