Wednesday, 13 January 2016

#WILTONLOVE recap


I was looking back at my previous #WILTONLOVE posts in particular my wish list and thought I would let you all know how I got on with my wishs. Sadly I didn't quite get all the things on my wish list last year but I did get some and here is what I thought of them.


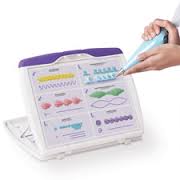
My number 1 Wish was a Wilton Practise board this is to practice different piping techniques and piping nozzles and can you believe I have had this for quite a while now and I haven't even used them yet, how busy life gets and practising got pushed aside, but I have officially added this to my New Years Resolutions as a to do, perhaps this weekend coming, ever hopeful for a weekend that is pain free and free enough to practise, but I will make it happen, I can at least tick it of my "To Buy" list.


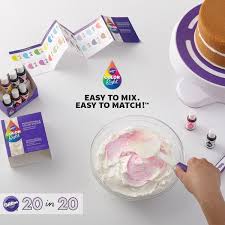
Sadly number 2 The Wilton Colour Right System is still not available in New Zealand, so unless Wilton decide to send me one to try out, this one will have to wait a little bit longer, maybe if I cross my fingers really tight it might become available in New Zealand this year.


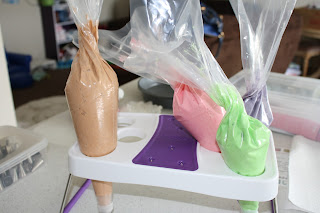
Number has become a new favourite of mine, I love it to pieces and can't believe that I went so long with it, The Wilton Decorating Bag Holder, so great to have when you are using multiple colours or piping tips, but now I even use it even if I am only using one colour because its great to have it standing on the bench letting gravity take over, plus there is the added bonus that it matches all my other purple Wilton gear and looks great in the pictures. Yes this definitely needs to be added to the favourites.


Number 4 the Wilton Bake Even Strips, can you believe that these to have eluded me this year, every time I go to purchase them they are out of stock, and every time I go to make a cake I curse that I haven't checked to see if they are back in stock, I am pretty sure Mummy brain is with you for life not just pregnancy. So these will also stay on my wish list, but I now have hubby on board and also wanting me to get them as he has been in the kitchen quite a bit these holidays making cakes with our son and leaving Mummy out and I explained to him what they do, he says to me "So why haven't you got them yet?" Perhaps he will be able to remind me next time I do an order.


Number 5 Wilton Colour Swirl I got this just before Christmas when I topped up some supplies, but it wasn't actually until earlier this week that I got to use it, desperately craving something sweet I decided to make some cupcakes, I had some butter cream left overs in the freezer and decided to use these, here's the thing I only had 2 different colours and not 3, but this was OK because I had watched the Youtube clip of this many of times and I had seen that you can use just 2 colours. All set up and ready to go, sadly this hasn't yet lived up to my expectations, its was quite difficult holding the two bags and squeezing the frosting out with out it coming out the top end, so first recommendation it to not use the piping bags that come with the Colour Swirl set but use larger ones at least 20" and the second unforeseen problem was because I was only using 2 colours and there is no "blank cap" to cover the 3rd section of the coupler icing also came out of there as well so this was an incredibly messy job, I did watch the Youtube clip again and although they don't show just using 2 colours they do say you can, but to be honest I don't see any way around it, I will try again with the 3 colours and for this I am sure it will work, but I'll let you know. Overall quite disappointed with this, although this may only be $3.99 in America I had to pay about $20.00 in New Zealand so quite expensive especially when it doesn't live up to expectations.


Number 6  The Wilton Cake Marker this is still on the wish, so far other things that I have deemed more important at that time have gone into my shopping cart first, but it is something the I still want, I do have a couple of the soft Wilton Measuring tapes and they are great but as much as I try I still don't quite get it level the whole way round the cake. So when this finally does make it into my cart I know I will use it a lot.


Number 7 was the Wilton Icing Smoother, why of why haven't I got this yet? I have bought cheaper brands and whilst they are pretty good they don't come as long as the Wilton one so you can't just do one swipe and I find the more you work with frosting whether its the crumb coating or the top coat the worse it gets you really need to do one clean swipe which is what the Wilton version allows you to do and lets face it the cheaper options don't match there is no purple handle and what does one do when ones decorating tools don't match? Well most people are fine but I go googoo gaga So this remains on my wish list for now. Perhaps I just need to do an order of all wish list items.


Number 8 the Wilton Turn-N-Tilt turntable, this beauty wow yes sadly she is still on my wish list again not available in New Zealand, come on Wilton I love you make all your products available to me please, I did get another version of this and I do love it to pieces, however there is one thing I can't really understand, the top of it is covered in a felt like substance, now I am guess this is for non slip purposes and that most people put a cake on a board straight away and then go about decorating it but I do the opposite I like to have my cake boards clean and the best way to achieve this I have found is to put the cake on the board at the last possible time and once it has been decorated so although I love and do use this turntable I go through alot more cake boards and I find I now have to decorate on one and then have a fresh one for when the cake is finished otherwise you get frosting and cake all over the top and Im not sure how I would go about cleaning this.

How did I do? Well I got 3 out of my 8 products on the wish list almost 50% and I think thats pretty good considering 2 of these items are still not available in New Zealand. I guess that leaves only only 6 items on my wish list I might need to create another one? I could really make an endless list as they keep coming up with great products I want to try.


One day when the kids are all grown up and I am old and Grey, Older and Greyer I guess, and Hubby and I make our way to America I will take an empty suitcase and bring it back full of Wilton.


A year later and still I still have #WILTONLOVE.


Tuesday, 12 January 2016

Christmas Wreath

And not forgetting the Gluten Free Wreath.

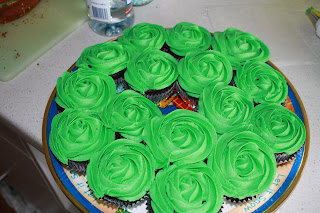
I was so excited to make this, and I had wanted to make 2 batches of cupcakes but someone who shall not be named told me I was making too much food, so I only made the one, but the Pin that I was modelling off used 24 cupcakes, so the proportions weren't quite right, but I still think it looks great.


I used the Wilton 1M piping tip with yummy green frosting and the rose technique, by the time I had frosted them I could see the whole idea coming together.


It was an extremely hot day, so into the fridge this went as I made up the other decorations.


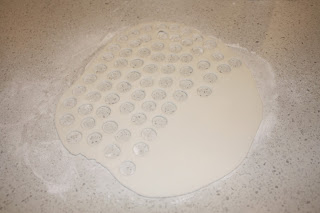
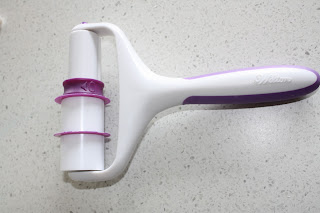
The bow was the most fun to make I found the video here. But I do feel some of the measurements were slightly off because I felt like the bow needed a little more length. I rolled out the fondant slightly thicker than I wanted and then used a embossing roller to roll to the right thickness and to create the pattern. I used my small rolling pins to place inside the bow while it dried so it didn't sage and for the strands I used Plastic dowelling, which I use when stacking my cakes to give a little shape.


I did all the decorations and the piping the day before we needed it and because I didn't want any of the fondant decorations to get soggy I waited till we were about to leave before I placed them on the wreath. Actually came together pretty quick and was really fun to make and I think it looks very effective, but next time definitely 24 cupcakes. This also went very fast, I just hope that the couple of kids who are actually Gluten intolerant actually got a taste.


Christmas time


Merry Christmas, I know I am a bit late, but holidays have been very busy and hubby is back to work tomorrow and I am finally catching up on things. Housework, well really only the washing, selfishly I have been more focus on getting up to date with blog and sorting out a crafting area for my scrapbooking, one must have craft in ones life or one would perish :)

This cake was a collaborated affair, This cake was make for my sons preschool end of the year concert and as I was making the cake hubby decided that he could help and this would be a good way for us to spend time together, to tell you the truth he got really into it and I think he really enjoyed himself. A good way to relax other than playing the Xbox.

I had bought 3 Topsy Turvy/ Mad hatter tins quite a while ago and hadn't used them before this, I had been searching Pinterest for Christmas cakes for a while and there were quite a few that had used these tins so I knew this is what I wanted to do. I had wanted to make a 3 tier cake but sadly after the first 2 cakes I ran out on ingredients so 2 tiers it was.


Because this was for going to be for kids I didn't want to make it overly sweet, especially in case my son got a piece because I am a meany mama and don't really let him have cake and if I do I normally scrap all the icing off, so I made a Butter Cake and did a thin layer of crumb coating.


Here is where my Mr. came in to save the day he covered the cakes with fondant, and did a really good job I think put me to shame, he decided on the colour scheme of a red bottom tier and green top tier with a layer of snow.


The base of the red was a little untidy so I rolled out some fondant sausages, again here would have been a great time to use a clay extruded I would have had lovely even sausages instead of what I did get, one in red and one in white slightly lopsided and then twisted them together to make a candy cane wrapping. Time to stack, actually quite hard to stack the topsy turvy cakes as you need to make sure you have the angles correct, and I think after finishing this cake to get the real topsy turvy effect you need to have more than 2 tiers, so Santa I know I have missed this Christmas but maybe next year you could bring me a couple more topsy turvy cake pans please in the next sizes, I promise I'll behave myself.


Now comes the fun, all the decorations and sculpting the figures this is where my husband shined and sort of took over, but I didn't mind he was having so much fun. I did try and make him watch the YouTube tutorials first, but his idea of watching was to press play not even look and do it his own way but I got to hand it to him they look great, but for those of you who do want to watch the videos Santa is here and the Reindeer is here just a wee note again because this cake is for children we used dry spaghetti pasta instead of toothpicks to attach the figures and as their wee skeletons. I did the tree and the snowman they were fairly simple, for the tree I made a conical shape and then using a pair of scissors I went down and around and cut little slits, and I cut out a wee star for the top. and for the Snowman well I think you can guess that one. Well I hope so ;)


Then I, with nothing else left to do while Gary was busy sculpting, made some decorations for the Gluten free Cupcake Wreath I was also making to take to preschool and used one of the spare gingerbread men and a star for the side of the cake.

I am sure as you can imagine the cake went down like a pile of bricks and once I handed it over to the teachers at preschool I never saw it again, just the plate with a few crumbs.


Hey now I'm an Allstar

Let me start this one off by saying this is now officially my favourite cake of all the ones I have done so far, this is another that has been in my mind for probably about a year.

Those of you that know my dear daddy know his passion (Obsession) for Chucks and one day I was wasting away time endlessly searching for cake ideas on Pinterest and I came across this video tutorial from  Ann Reardon and instantly I thought of dad. Of course this was In October and dads birthday is at the end of November but mum and dad were still living in Auckland at the time and I wouldn't be seeing him for his birthday so I had to keep the idea in my back pocket and continue searching and pinning tutorials. By the time this November came around I had watched Ann's video hundreds of times and pinned thousands of other Chuck cakes.

Though dad has several different colours and kinds of Chucks I thought his Blue pair would be the best to replicate so I got pre-coloured fondant a lot less messy, and the blue was the perfect colour.


Although Ann's video does show you how to make one of the two logos I thought it would look best to have them printed. I was unusually un-organised for dads cake especially considering I had a year to plan so I didn't have enough time to get the Chuck Allstar logo (The circle) and Converse Logo (the rectangle) printed from my usual ladies up in Auckland but I remember being told that someone here in Rolleston does edible printing so I got them from Debbie from Logos on cakes very handy as she is only about 5 minutes down the road. I got extras printed just incase.


If you watch Ann's video you will see she has the templates on her website, but when I went onto her website it turns out you actually have to pay for the template I think I paid $4.99 Australian, which I was happy to pay as I knew I would then have the template for ever and although I found the template wasn't quite accurate it was a good starting point and next time I make it I will enlarge a few of the pieces.

I decided to try a different cake for dad as he isn't too keen on sweet cakes so mum and I found a raspberry swirl cake which we thought would be nice. So using my new sheet cake pan (See hubby I don't buy things and only use them once) I made 2 cakes as per Ann's instructions but I actually only needed the one cake for one shoe so I know next time if I want to make a pair I will make 2 cakes again, though I have a feeling that the template from Ann was actually smaller than the one she used.


My sheet pan was the same width/depth which ever way you call it as the shoe template which worked out perfectly.


 I cut out 2 of the templates whole and stacked them on top of each other, Then using the side template I checked what level I was up to, this determined how long my 3rd layer would be. 


It worked out to be about half, I cut 1 more layer and that was enough to make it to the correct height.


Next up it was time to sculpt the shoe down, this was quite hard as the cake was very soft and crumbly but I managed to get it done.


Crumb coating, 


At this stage it looks a little crazy but it all works out in the end. While I had the cake in the fridge to set the crumb coat I made the Gromets for the shoe laces, I needed 20 altogether, but of course I did some extras and chose the best ones for the cake. To make the shapes I used 2 different sized plain circle piping nozzles as cutters, Ann does give you a guide to the right sizes with the template and I just matched as close as I could.


To paint the Gromets I used Silver Lusture Dust and Cake Decorators fluid and mixed into a paste.


After the crumb coating had set and the cake was colder and therefore a little more stable, I was able to shave down the 2 edges which gave a more rounded look. Then added some more butter cream on the newly exposed cake.


Now the exciting part, the Fondant, where the cake the really takes shape and comes together. Firstly some black to cover the top of the shoe. The key to this is to smooth the edges of the fondant right down so that it is flush with the butter cream and therefore wont be seen under the top layer of fondant. Ann suggests using a cardboard ring covered in baking paper for the top of the shoe, as a temporary fixture to prevent the "Tongue" of the shoes drooping down, however the wee one I made kept falling of and to be honest was more of a hindrance so I didn't use it that much.


Next up is the "Tongue" of the shoe, 1 layer of the blue and 1 partial layer of white, if I were to make the cake I would do a complete layer of white, I feel it would have given a cleaner finish. I used a very small amount of water to attach the 2 layers together, if you use to much water the fondant goes soggy and will rip and tear more easily. Then smoothed it on to the cake. On Ann's video her piece of fondant went right to the toe and further so I do think that the template needs a little work.


Next up the sides of the shoe, Key point, very important when cutting out the template you need to cut one pair, meaning cut one as is then flip the pattern over, other wise you end up with 2 rights rather than a left and a right side of the shoe. In Ann's video she cut her template in the colour and then used a thin strip of white for the edges, I did trial it this was but found making an entire template in white worked much better, it does make the fondant a bit thicker but I think it is worth it to get a cleaner look.


Again using a very small amount of water I attached the white fondant to the blue, then I wrapped in glad wrap so that it didn't dry out.


Smoothing the panel fondant was so easy, I find smoothing fondant normally on cakes much harder and I normally always get rips, but this came out perfect! Again on Ann's tutorial her panel started where mine does at the toe but went right back to the centre of the back of the shoe, mine did not but I made a fix for that after. Then I smoothed on the other side.


To finish the back of the shoes I cut the strip for the back of the shoe a little wider. Then I used the "stitching" wheel to create stitch lines on the strip. I used a little water to attach the strip to the shoe and cut it off at the top matching the height of the side panels.


Using a piece of white fondant I had rolled out before I placed on the toe of the shoe to create the rubber tip of the shoe, because  the "Tongue" panel didn't go right to the toe and down this meant the white rubber part of the shoe wasn't flush with the other fondant, so I guess to fix this I could have rolled the fondant a bit thicker but I didn't foresee the issue, but no worries, as I said next time I make this cake I will fiddle with the templates a little.

Using my fabulous Wilton Ribbon Cutter I cut white strips to match Ann's template for the bottom of the shoe.


Using a very small amount of water I attached the first strip to the side of the shoe. Now a really thin thin strip of black, which goes on the second white strip. I attached the second white strip after adding the black line.


Using the end of a paint brush and with a small amount of pressure I made indents for the placement of the Gromets. 8 down each side of the shoe and 2 of the side for the air vents. Then using a small amount of water I glued them to the shoe.


Ann's uses a clay extruder to make her shoes laces, but I am yet to acquire one of these fantastic tools, so I used my Wilton Ribbon Cutter instead, the problem I found with this, is by the time you roll your fondant to the right thickness and then cut the strips it can make the fondant quite dry and therefore easy to crack, tear and rip.


I think the laces came out well but they did take more time cause I had to keep throwing cracked and ripped laces away.


Using the same "Stitching" wheel I created stitch lines along the fabric of the shoe. and lastly it was time to attach my printed logos, this I did with a little bit of water, but next time I might use a bit of piping gel as I found the water came right through to the top of the logo and I had a small amount of ink running.


The finished cake, This was one of my most time consuming but most fun cake to make and I was very happy with the outcome. My dad loved the cake, and at first didn't realise that it was a cake. I can't wait to make it again, but in what colour??