
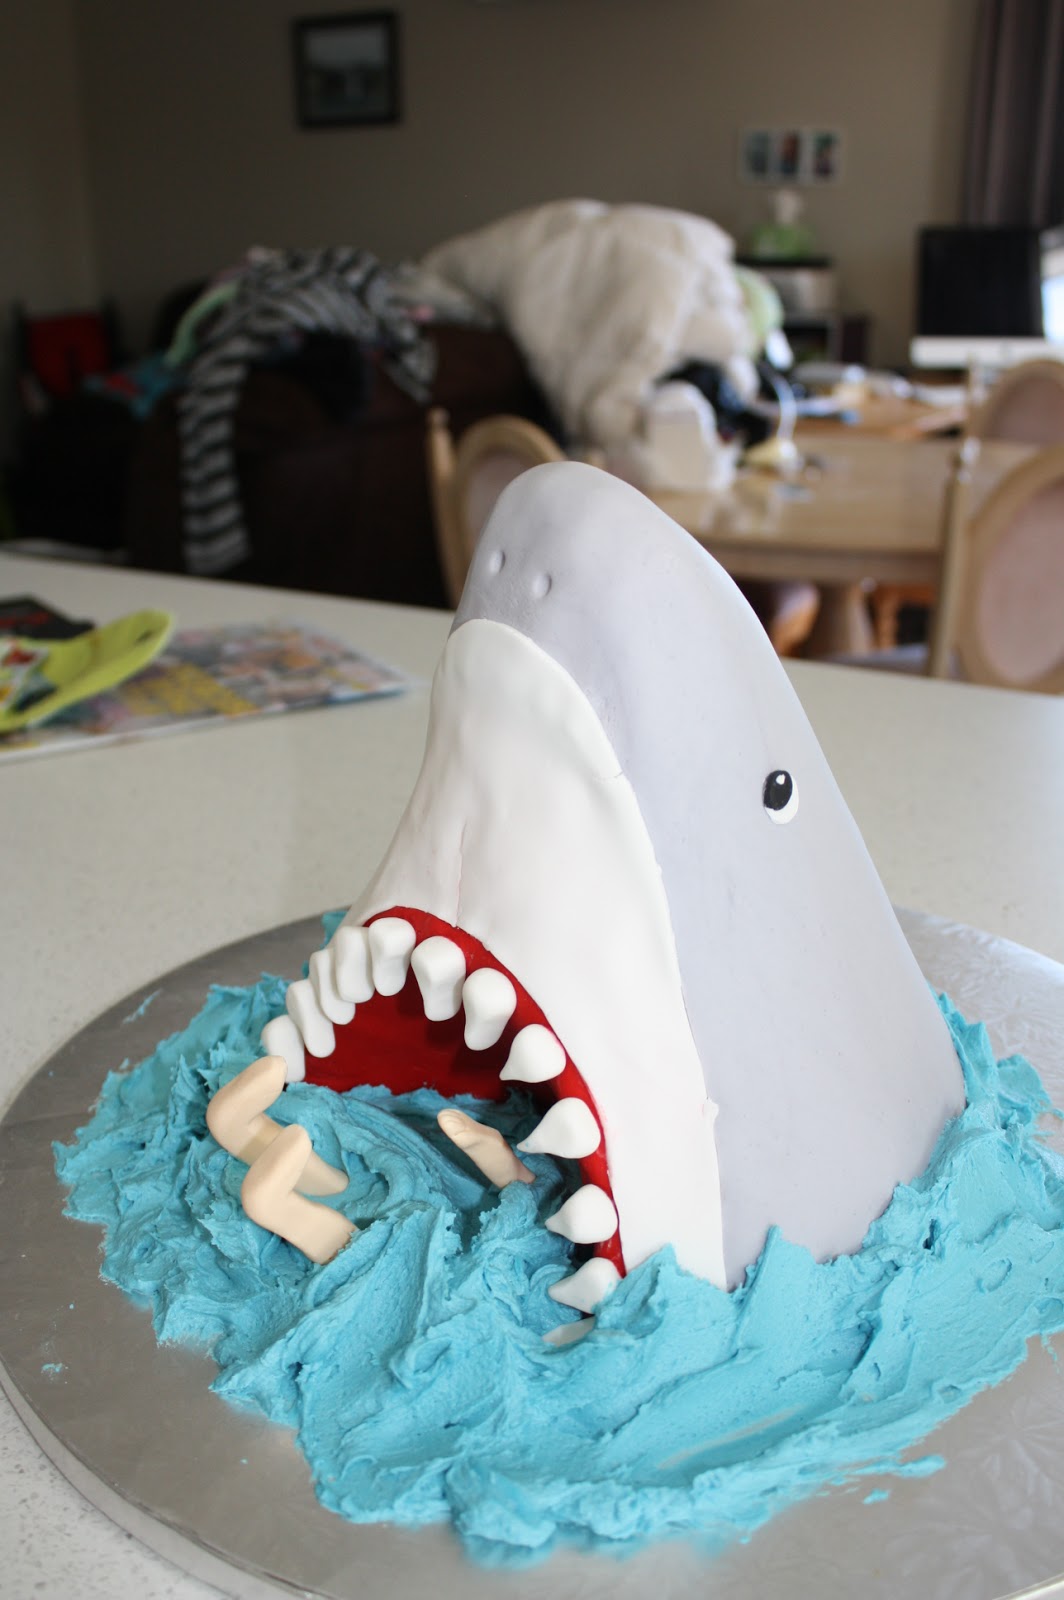
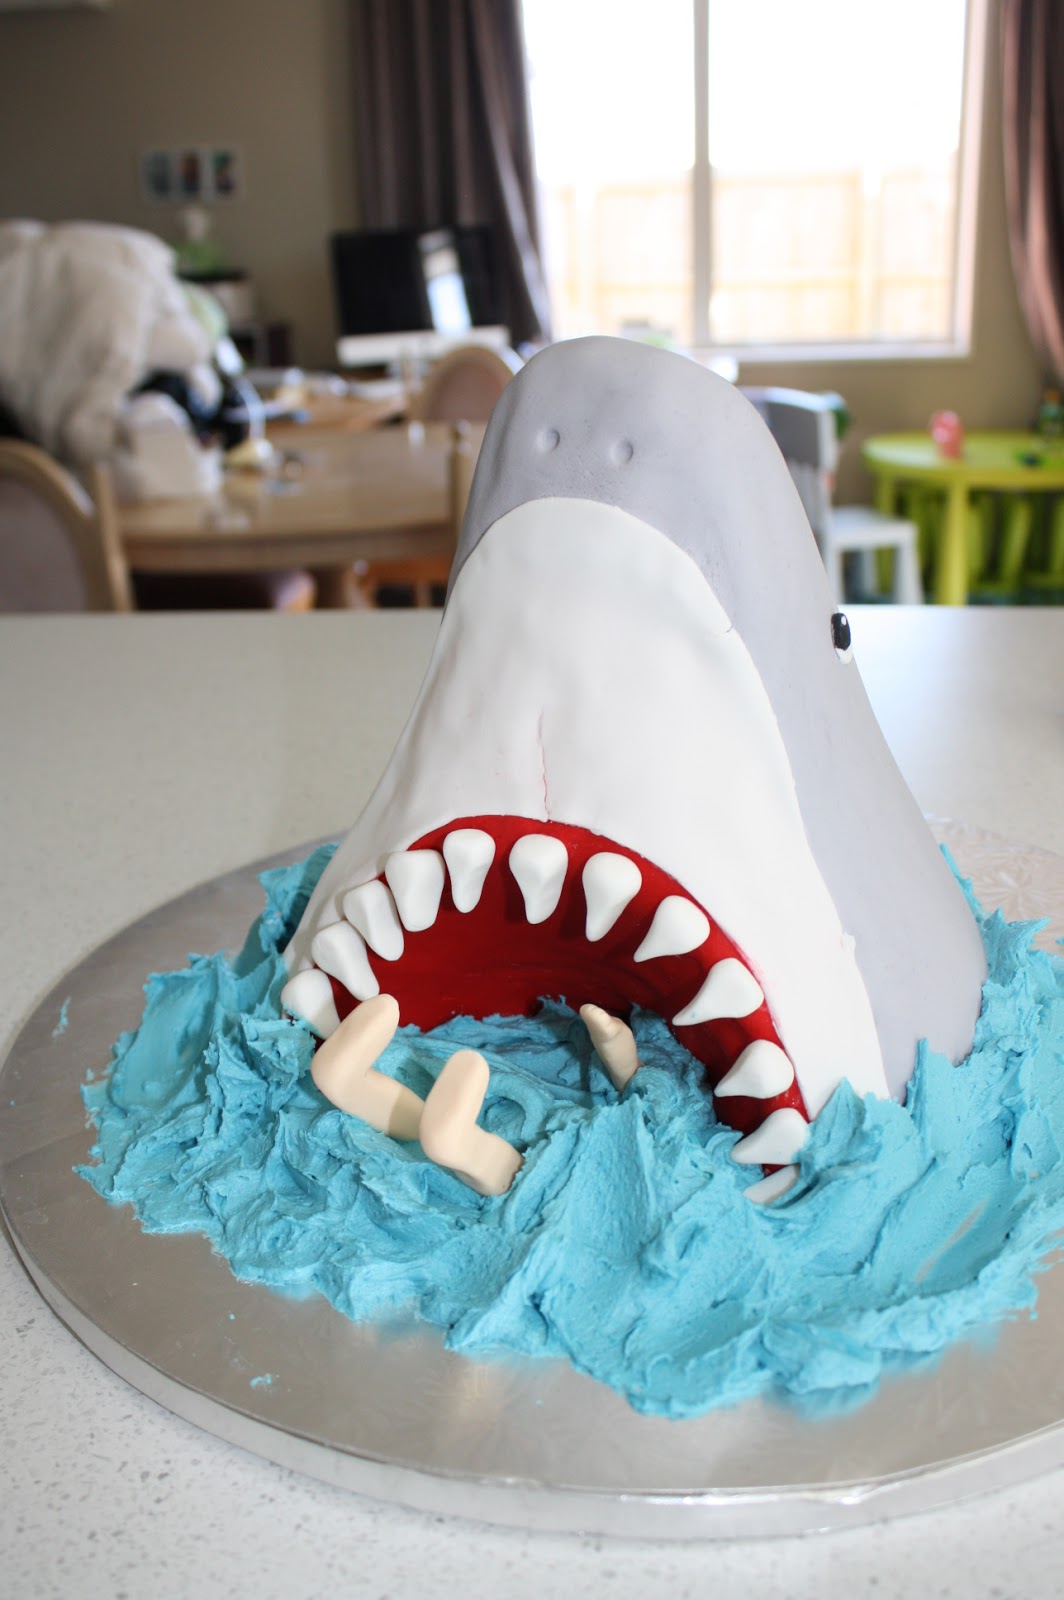
Now for my cake I have been wanting to do this for about a year so a lot of planning has gone into this. I had first seen it in a book and of course it is also all of Pinerest. I have been thinking about how exactly I would get the right shape, at first I thought I would use my favourite "Easy layers" pan set and sculpt the entire shape, but then it came to me very suddenly that I could achieve the most of the shape I needed if I used a Dolly Varden tin and sculpt up. This was very successful! I used the cake that I cut out for his wee mouth to sculpt up the nose.

After crumb coating I used the same trick that I did for Sian and Lisa's cakes to smooth out the frosting.
You might be wondering why I did pink frosting for the crumb coat especially because the majority of the fondant is grey, Well I specifically made a strawberry cake which was also pink so that when you cut into the cake you would see pink, this way it would be like really cutting into a shark and seeing their flesh.


While this was setting I used a small round cookie cutter to cut out rolled fondant for his eyes.Using white and black.

Then I covered him in fondant, I used white fondant which I added in some pre coloured black to get a nice grey shade. I didn't cover the whole head because for his mouth and underside I would be using different colours and I didn't want the fondant doubled in thickness.
For his nostrils I used a ball tool to indent small circles.

I rolled out some pre coloured red fondant for his mouth and used a ruler to cut a straight edge for the base, smoothed it into his mouth and then using a very sharp scalpel to cut around. I wanted to do the red first as I didn't the red marking the white fondant.

For the white of his belly I sketched out the rough shape on a piece of paper and checked it against my wee boy and then used it as a pattern to cut out the white fondant. I used a small amount of edible glue to ensure that it sealed and stuck to him, I made the white fondant slightly larger than the space required so I knew there would be no crumb coating showing I didn't mind having a small overlap as I figured that would be better than exposed crumb coat. Sadly because it a flimsy shape when I picked up the white fondant it did rip almost at the centre, I tried to smooth it out but it as it didn't quite go away I decided that it would be a "Battle Scar" and gave him more character.
Using the edible glue I attached his wee eyes, after I had I realised that I had probably positioned them too high.


To make the teeth I used white fondant which I first rolled into balls and then into flat tear drops. I made them all slightly different in shape and in size. I let them dry and harden for a few hours before I used them. Again using my edible glue I attached them onto the jaw line.

After I had made the teeth I used some Ivory fondant to make a couple of legs and an arm which I also left to dry/harden before I used them.

To create the Ocean I made up 1 batch of Blue buttercream frosting. I spread this along the cake board and up to the shark I tried to create "peaks" to make waves. Then I placed the body parts into his mouth.

And there you have it, Eaten alive!


This has now taken pride of place in my heart as my favourite cake.
No comments:
Post a Comment