Saturday, 6 February 2016

SMASH SOSO or Lick


The second cake I made for Sophie, cause big girls need more than one cake, was a "Smash" cake and I thought the best thing her would be a giant cupcake, fairly easy to make and looks really effective, I had made one of these before and really enjoyed making it so was excited to make it again while at the same time trying to get it to look different. I decided to give my Wilton Colour Swirl coupler another try but this time I would use it with 3 colours, pink, purple and yellow. I also wanted to make a wee Badger figurine as badgers are very special to my sister and her husband and one of Sophie's nicknames is Badgelet. 

I used Wiltons Vibrant Green Candy Melts for the Patty case of the cupcake, and using what I learnt last time I made this cake I used the Fridge rather than the freezer to cool between coats and once I brought it out of the fridge I waited for it to come up to room temperature before adding the next coat. I did still get one crack not sure where that one came from but I didn't worry too much as it was going to be a "Smash" cake.


After baking the cake, one half at a time, I cooled them and then cut down the bottom part of the cupcake so that it would fit into the chocolate patty case. The cake recipe I used this time was a devils food but a different to my normal and it didn't rise as much so it wasn't quite as tall as the patty case but this was alright as I needed a layer of butter cream to stick the top of the cupcake on anyway. I tried to match the butter cream to the Vibrant Green candy melts using Wilton Lemon Yellow and Leaf Green. Then I crumb coated the top layer. and into the fridge to set overnight this time as I was running out of time.


I worked on the Badger figurine while the crumb coating was setting, try as I did I couldn't find any tutorials for a fondant Badger so instead I just had to make it up from looking at pictures but I am pretty happy with the way it turned out, I also gave her a "Thug life" hair ribbon as Sophie often wears these.


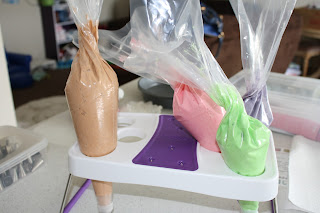
On the morning of the party I got my 3 colours of butter cream ready and into my piping bags, sadly I was all out of my 20" piping bags so again I was dealing with small piping bags so I could only put a small amount of icing in and had to keep refilling it, however the Colour Swirl Coupler did work much better using it with 3 colours rather than the 2 colours I tried last time. Every now and then I would rotate the colours within my hand so that a different colour would be more predominant. I piped roses again using the Wilton 1M piping tip and I filled any empty spaces with a straight on angle and just piped a small amount of icing, I also then went around the under edge of the cake and piped under there as well.


Then it was time to add the badger and the all important number 1 candle.


I  had wanted to make Sophie a "Smash" cake so she could just dig in of course being the perfect little lady she didn't quite dig in as expected but rather very delicately with her fingers she slid them into the icing and into her mouth and then the big smile came across her face. Then she looked at her mother and said "Mum seriously this is good stuff can we have this every day?"


So the cake didn't quite end up "Smashed" however all the kids enjoyed wiping all the icing off lets face it that's always the best part.

Tuesday, 26 January 2016

Happy First Birthday Sophie


My beautiful little niece has been touring around New Zealand on holiday from Perth and finally she has made her way to Christchurch, of course her parents are here too but they are not quite as important as my little Sophie Jean. During her travels she turned the big One so of course we had to have a party for her and of course this party means cake, or two.


I had known pretty much since I found out my sister was pregnant that no matter what I wanted to make her babies first birthday cake and I also knew that it had to be The Very Hungry Caterpillar. When my sister was younger, very young she had a very special relationship with our Great Grandmother Jean Brodie, so much that she even named her daughter after her. Sadly she passed away while we were both still very young, I myself have no memories of her but I know my sister has a few and one of them is that book and them reading it together, so it has always been a special book to her, I really wanted to honour that with Sophie's first birthday cake as I am sure it would mean a lot to my sister but also to my Great Grandmother, who we always referred to as Special Nana, who I know watches over us and who I also know would have been at the party.


I had taken a class at The Make Cafe probably over a year ago in preparation to make this cake, it was just to show how to make the caterpillar and some of the food decorations. But I also spent many a hours on Pinterest looking at the different ideas that people had come up with for their cakes. I had planned on making a 2 tier cake, but by the time I stacked up the first tier I started thinking this is just too much cake for our wee party and it might be a tad wasteful so I had to work on my design a bit but I am happy with how it turned out.


After watching a couple of  cakes shows this last week I noticed that some of the bakers roll their fondant a lot thicker than I have been doing so I decided with this cake to give it a try and it was brilliant, ok I know my cake is a bit bumpy but that is due to a wee disaster in the removal of the cake from the pans, normally I remove the cakes about 5 minutes after I take them out of the oven but I put them to the side and forgot and they sweated and I had an issue taking them out but despite that this is the first cake in a long time that I have covered and the fondant has not ripped along the top so I am very happy with how it came out and now I am excited to cover my next cake.


I cut out some leaves with a plunger cutter, this cuts the shape and also embosses the leaf so you don't need to use a veining tool or mould to get the texture. Then I cut out the letters for Sophie and "glued" them on with a little bit of water. To make the caterpillar I made up a few different coloured greens and made different sized balls and then I squeezed the end of some of the balls to make a tear drop shape. Using some water I "glued" the pieces together and to make the "hump" to make the caterpillar look like it is moving I used the tear drop pieces and placed them one on top of the other with every second one upside down, I made a smaller caterpillar than I had originally planned as I was only making a single tiered cake. Then I made a larger ball in red and shaped for the head. 


I spent a very long time creating all the wee decorations for this cake, but I had so much fun making it that it didn't seem like an arduous task. I know that traditionally The Very Hungry Caterpillar is very bright colours but I wanted to make it a little more feminine so I used some pastel colours. I used a very small round cutter, which actually came from one of my number cutter sets, to cut the coloured circles which I used as a border for the bottom of the cake.


Then I used a larger circle to cut out for the oranges and the apple, using some more of the small purple circles I grouped them together to make a bunch of grapes, to make the pear I used an oval cutter and then shaped the top again using my wee circle cutter and then I smoothed the edges. For the cheese I just cut a triangle and again with my wonderful wee circle cutter, I made random cuts to make the cheese Swiss. The ice cream, I rolled a sausage with the purple and then shaped it and the cone again I just cut a triangle and then used my blade tool to create dents to make it look like a waffle cone. The cupcake was just a cutter, the cake was probably my favourite and that was just cutting a square and then I rolled some thin sausages out of a darker brown and "glued" them on with a small amount of water and rolled a wee circle for the cherry. The lollipop again just rolling sausages and then "glueing" them together then rolling it up. 


I used all my leftover coloured fondant and put it altogether and rolled it to make the multi coloured butterflies, but I didn't end up using them as there wasn't room on the cake.


Now it was time to put it all together, this is always the best part! I randomly placed all the circles around the base of the cake, in no particular order and I ended up having enough to make 3 rings. I placed the number 1 right in the middle of the cake and then had fun placing the different food items around the cake, and the wee caterpillar on top.


So for you Special Nana the end result from all angles, I hope you enjoyed watching me make it and then watching everyone and the party enjoy it, we saved you a piece.


Wednesday, 13 January 2016

#WILTONLOVE recap


I was looking back at my previous #WILTONLOVE posts in particular my wish list and thought I would let you all know how I got on with my wishs. Sadly I didn't quite get all the things on my wish list last year but I did get some and here is what I thought of them.


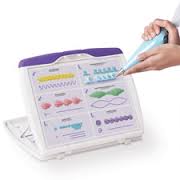
My number 1 Wish was a Wilton Practise board this is to practice different piping techniques and piping nozzles and can you believe I have had this for quite a while now and I haven't even used them yet, how busy life gets and practising got pushed aside, but I have officially added this to my New Years Resolutions as a to do, perhaps this weekend coming, ever hopeful for a weekend that is pain free and free enough to practise, but I will make it happen, I can at least tick it of my "To Buy" list.


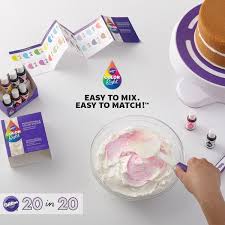
Sadly number 2 The Wilton Colour Right System is still not available in New Zealand, so unless Wilton decide to send me one to try out, this one will have to wait a little bit longer, maybe if I cross my fingers really tight it might become available in New Zealand this year.


Number has become a new favourite of mine, I love it to pieces and can't believe that I went so long with it, The Wilton Decorating Bag Holder, so great to have when you are using multiple colours or piping tips, but now I even use it even if I am only using one colour because its great to have it standing on the bench letting gravity take over, plus there is the added bonus that it matches all my other purple Wilton gear and looks great in the pictures. Yes this definitely needs to be added to the favourites.


Number 4 the Wilton Bake Even Strips, can you believe that these to have eluded me this year, every time I go to purchase them they are out of stock, and every time I go to make a cake I curse that I haven't checked to see if they are back in stock, I am pretty sure Mummy brain is with you for life not just pregnancy. So these will also stay on my wish list, but I now have hubby on board and also wanting me to get them as he has been in the kitchen quite a bit these holidays making cakes with our son and leaving Mummy out and I explained to him what they do, he says to me "So why haven't you got them yet?" Perhaps he will be able to remind me next time I do an order.


Number 5 Wilton Colour Swirl I got this just before Christmas when I topped up some supplies, but it wasn't actually until earlier this week that I got to use it, desperately craving something sweet I decided to make some cupcakes, I had some butter cream left overs in the freezer and decided to use these, here's the thing I only had 2 different colours and not 3, but this was OK because I had watched the Youtube clip of this many of times and I had seen that you can use just 2 colours. All set up and ready to go, sadly this hasn't yet lived up to my expectations, its was quite difficult holding the two bags and squeezing the frosting out with out it coming out the top end, so first recommendation it to not use the piping bags that come with the Colour Swirl set but use larger ones at least 20" and the second unforeseen problem was because I was only using 2 colours and there is no "blank cap" to cover the 3rd section of the coupler icing also came out of there as well so this was an incredibly messy job, I did watch the Youtube clip again and although they don't show just using 2 colours they do say you can, but to be honest I don't see any way around it, I will try again with the 3 colours and for this I am sure it will work, but I'll let you know. Overall quite disappointed with this, although this may only be $3.99 in America I had to pay about $20.00 in New Zealand so quite expensive especially when it doesn't live up to expectations.


Number 6  The Wilton Cake Marker this is still on the wish, so far other things that I have deemed more important at that time have gone into my shopping cart first, but it is something the I still want, I do have a couple of the soft Wilton Measuring tapes and they are great but as much as I try I still don't quite get it level the whole way round the cake. So when this finally does make it into my cart I know I will use it a lot.


Number 7 was the Wilton Icing Smoother, why of why haven't I got this yet? I have bought cheaper brands and whilst they are pretty good they don't come as long as the Wilton one so you can't just do one swipe and I find the more you work with frosting whether its the crumb coating or the top coat the worse it gets you really need to do one clean swipe which is what the Wilton version allows you to do and lets face it the cheaper options don't match there is no purple handle and what does one do when ones decorating tools don't match? Well most people are fine but I go googoo gaga So this remains on my wish list for now. Perhaps I just need to do an order of all wish list items.


Number 8 the Wilton Turn-N-Tilt turntable, this beauty wow yes sadly she is still on my wish list again not available in New Zealand, come on Wilton I love you make all your products available to me please, I did get another version of this and I do love it to pieces, however there is one thing I can't really understand, the top of it is covered in a felt like substance, now I am guess this is for non slip purposes and that most people put a cake on a board straight away and then go about decorating it but I do the opposite I like to have my cake boards clean and the best way to achieve this I have found is to put the cake on the board at the last possible time and once it has been decorated so although I love and do use this turntable I go through alot more cake boards and I find I now have to decorate on one and then have a fresh one for when the cake is finished otherwise you get frosting and cake all over the top and Im not sure how I would go about cleaning this.

How did I do? Well I got 3 out of my 8 products on the wish list almost 50% and I think thats pretty good considering 2 of these items are still not available in New Zealand. I guess that leaves only only 6 items on my wish list I might need to create another one? I could really make an endless list as they keep coming up with great products I want to try.


One day when the kids are all grown up and I am old and Grey, Older and Greyer I guess, and Hubby and I make our way to America I will take an empty suitcase and bring it back full of Wilton.


A year later and still I still have #WILTONLOVE.


Tuesday, 12 January 2016

Christmas Wreath

And not forgetting the Gluten Free Wreath.

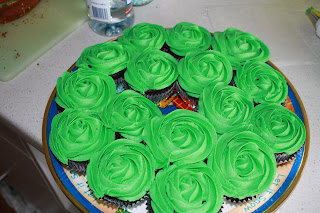
I was so excited to make this, and I had wanted to make 2 batches of cupcakes but someone who shall not be named told me I was making too much food, so I only made the one, but the Pin that I was modelling off used 24 cupcakes, so the proportions weren't quite right, but I still think it looks great.


I used the Wilton 1M piping tip with yummy green frosting and the rose technique, by the time I had frosted them I could see the whole idea coming together.


It was an extremely hot day, so into the fridge this went as I made up the other decorations.


The bow was the most fun to make I found the video here. But I do feel some of the measurements were slightly off because I felt like the bow needed a little more length. I rolled out the fondant slightly thicker than I wanted and then used a embossing roller to roll to the right thickness and to create the pattern. I used my small rolling pins to place inside the bow while it dried so it didn't sage and for the strands I used Plastic dowelling, which I use when stacking my cakes to give a little shape.


I did all the decorations and the piping the day before we needed it and because I didn't want any of the fondant decorations to get soggy I waited till we were about to leave before I placed them on the wreath. Actually came together pretty quick and was really fun to make and I think it looks very effective, but next time definitely 24 cupcakes. This also went very fast, I just hope that the couple of kids who are actually Gluten intolerant actually got a taste.


Christmas time


Merry Christmas, I know I am a bit late, but holidays have been very busy and hubby is back to work tomorrow and I am finally catching up on things. Housework, well really only the washing, selfishly I have been more focus on getting up to date with blog and sorting out a crafting area for my scrapbooking, one must have craft in ones life or one would perish :)

This cake was a collaborated affair, This cake was make for my sons preschool end of the year concert and as I was making the cake hubby decided that he could help and this would be a good way for us to spend time together, to tell you the truth he got really into it and I think he really enjoyed himself. A good way to relax other than playing the Xbox.

I had bought 3 Topsy Turvy/ Mad hatter tins quite a while ago and hadn't used them before this, I had been searching Pinterest for Christmas cakes for a while and there were quite a few that had used these tins so I knew this is what I wanted to do. I had wanted to make a 3 tier cake but sadly after the first 2 cakes I ran out on ingredients so 2 tiers it was.


Because this was for going to be for kids I didn't want to make it overly sweet, especially in case my son got a piece because I am a meany mama and don't really let him have cake and if I do I normally scrap all the icing off, so I made a Butter Cake and did a thin layer of crumb coating.


Here is where my Mr. came in to save the day he covered the cakes with fondant, and did a really good job I think put me to shame, he decided on the colour scheme of a red bottom tier and green top tier with a layer of snow.


The base of the red was a little untidy so I rolled out some fondant sausages, again here would have been a great time to use a clay extruded I would have had lovely even sausages instead of what I did get, one in red and one in white slightly lopsided and then twisted them together to make a candy cane wrapping. Time to stack, actually quite hard to stack the topsy turvy cakes as you need to make sure you have the angles correct, and I think after finishing this cake to get the real topsy turvy effect you need to have more than 2 tiers, so Santa I know I have missed this Christmas but maybe next year you could bring me a couple more topsy turvy cake pans please in the next sizes, I promise I'll behave myself.


Now comes the fun, all the decorations and sculpting the figures this is where my husband shined and sort of took over, but I didn't mind he was having so much fun. I did try and make him watch the YouTube tutorials first, but his idea of watching was to press play not even look and do it his own way but I got to hand it to him they look great, but for those of you who do want to watch the videos Santa is here and the Reindeer is here just a wee note again because this cake is for children we used dry spaghetti pasta instead of toothpicks to attach the figures and as their wee skeletons. I did the tree and the snowman they were fairly simple, for the tree I made a conical shape and then using a pair of scissors I went down and around and cut little slits, and I cut out a wee star for the top. and for the Snowman well I think you can guess that one. Well I hope so ;)


Then I, with nothing else left to do while Gary was busy sculpting, made some decorations for the Gluten free Cupcake Wreath I was also making to take to preschool and used one of the spare gingerbread men and a star for the side of the cake.

I am sure as you can imagine the cake went down like a pile of bricks and once I handed it over to the teachers at preschool I never saw it again, just the plate with a few crumbs.